 Save
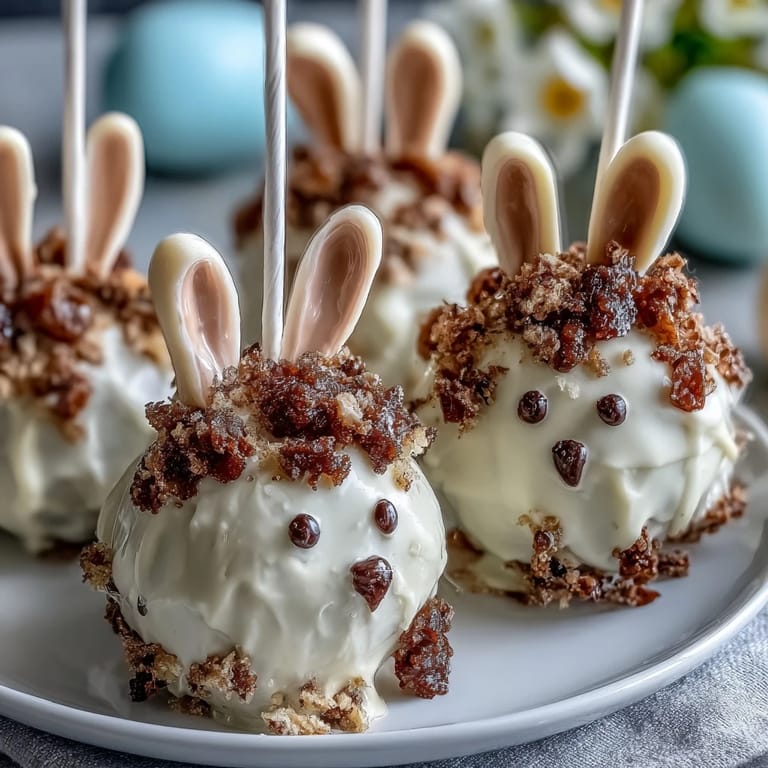
Save My sister called me in a panic three days before Easter, wondering if I could whip up something special for her daughter's classroom party. I found myself at the kitchen counter at midnight, covered in white chocolate smudges, laughing at how these little bunny cake pops turned into tiny edible works of art. What started as a last-minute scramble became the thing everyone asked about for weeks afterward. There's something magical about turning cake crumbs into creatures that actually make people smile before they even take a bite.
I'll never forget watching my niece's face light up when she realized the bunny had a little marshmallow tail. She immediately started naming hers and asking if the others had names too. That's when I understood these weren't just desserts—they were tiny edible personalities that somehow made the whole celebration feel more intentional and joyful.
Ingredients
- Vanilla or funfetti cake mix (1 box, about 400 g): This is your foundation, and honestly, there's no shame in using a box mix here—it keeps the crumb structure perfect for rolling.
- Eggs, oil, and water for cake mix: Follow what the box tells you, but don't skip any of it or your cake will be too dry to work with later.
- Cream cheese (100 g, softened): This gives the frosting tang and structure so the cake balls don't fall apart when you dip them.
- Unsalted butter (60 g, softened): Room temperature butter blends smoothly and helps everything stick together without being greasy.
- Powdered sugar (120 g): Sift it if you have time to avoid lumps that'll show up in your final coating.
- Vanilla extract (1/2 tsp): A tiny touch that makes people wonder what they're tasting.
- White chocolate melting wafers (400 g): These are easier than chopped chocolate because they melt smoother and stay fluid longer.
- Lollipop sticks (24): Paper sticks work fine, but wooden ones feel sturdier in your hand.
- Pink candy melts or colored chocolate: For the ears and nose—keep extras on hand because you'll definitely trim and adjust.
- Edible black food marker or dark chocolate: The marker is faster, but melted chocolate gives a more professional finish if you're patient.
- Mini marshmallows (optional): Just one tiny piece per pop makes the tail look surprisingly realistic.
- Rainbow sprinkles or pastel confetti (optional): These add personality and hide any imperfections in your coating.
Tired of Takeout? 🥡
Get 10 meals you can make faster than delivery arrives. Seriously.
One email. No spam. Unsubscribe anytime.
Instructions
- Bake and cool your cake:
- Follow the box instructions exactly, then let it cool completely on a wire rack. A warm cake will make your frosting melt and your balls won't hold their shape.
- Make the frosting:
- Beat the softened cream cheese and butter together until they're pale and fluffy, about two minutes. Add the powdered sugar gradually while mixing, then the vanilla extract, until you have something that tastes like creamy clouds.
- Create your cake ball mixture:
- Crumble the cooled cake into a large bowl until you have fine, even crumbs. Add the frosting in small spoonfuls, mixing gently each time, until the mixture feels like damp sand that holds together when squeezed.
- Roll and shape:
- Portion the mixture into 24 roughly equal pieces and roll each one into a ball. Gently pinch and shape each ball into a slight oval so it reads as a bunny head instead of just a sphere.
- Freeze for stability:
- Place your shaped balls on a parchment-lined baking sheet and freeze for 20 minutes. This is non-negotiable—it keeps them from falling apart during the dipping step.
- Melt the white chocolate:
- Use a microwave-safe bowl and melt in 30-second intervals, stirring between each one, until smooth and pourable. Overheated chocolate seizes up and becomes grainy, so patience is everything here.
- Secure the sticks:
- Dip the tip of each lollipop stick into the melted chocolate, then gently push it halfway into each frozen cake ball. The chocolate acts like glue and keeps the stick from spinning.
- Coat with white chocolate:
- Working one at a time, dip each cake pop into the melted white chocolate, twisting gently as you pull it out. Tap the stick softly against the bowl's edge to let excess chocolate drip off, then stand it upright in a styrofoam block to set.
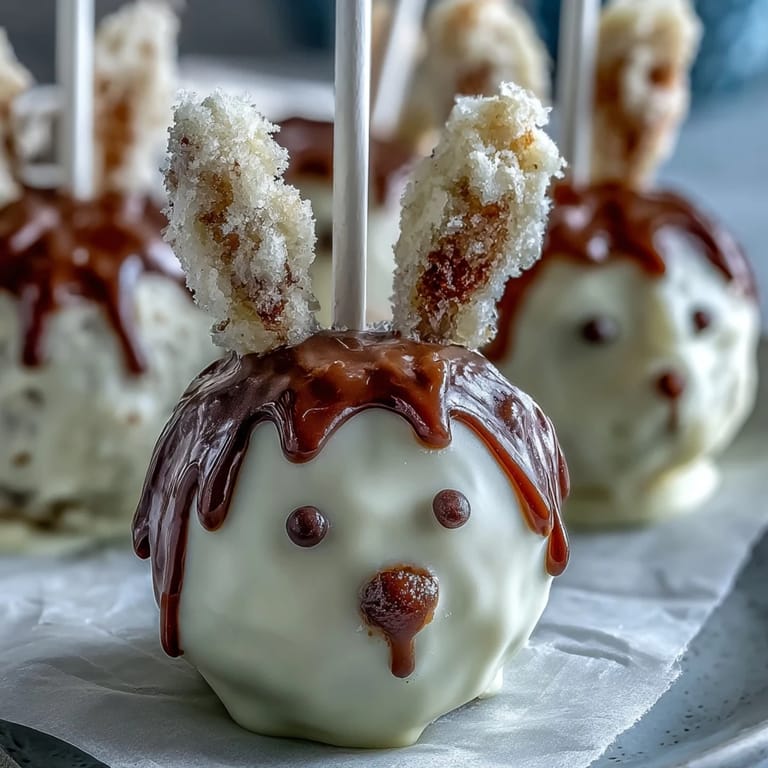
- Add ears while coating is wet:
- If you're using pre-made pink ears, press them gently into the white chocolate while it's still tacky. If you're cutting them yourself from hardened pink candy melts, attach them with a tiny dab of leftover melted white chocolate.
- Add the tail:
- While the coating is still soft, stick a tiny piece of marshmallow to the back of each pop where a bunny's tail would be. It'll set into place as the chocolate hardens.
- Draw facial features:
- Once everything is completely set, use your edible marker to draw two dots for eyes and three short lines for whiskers. If you're using melted dark chocolate instead, pipe it on with a toothpick or piping bag for more control.
- Final touches and set time:
- Add a small dot of pink for the nose and scatter sprinkles or confetti around the pop if you want. Let everything harden completely before packaging or serving.
 Save
Save There was a moment when my niece asked if we could make them together the next year. That's when I realized these little bunnies had become more than just a dessert—they were a tradition now, something we'd do side by side.
Getting Your Shapes Right
The first time I made these, I obsessed over making perfect bunny heads, but honestly, slightly imperfect ovals with personality beat flawless spheres every single time. The little quirks are what make them charming. If you want to get fancy, you can use a small melon baller or a cookie scoop to portion them evenly, which saves a lot of time and keeps your batches consistent.
Chocolate Coating Secrets
The consistency of your melted chocolate makes or breaks this whole thing. If it's too thick, you'll get a chunky coating that looks rough; if it's too thin, it'll drip off and you'll lose all your decorations. The sweet spot is when it coats the cake pop smoothly and sets to a thin shell in seconds. If you find your chocolate cooling too fast, you can microwave it for just 15 seconds to loosen it back up.
Decoration Timing and Storage
Timing is everything when you're decorating—ears stick best when the coating is still slightly tacky, but if you wait too long, they'll just slide right off. I learned this the hard way when I came back to add details five minutes later and watched pink ears sliding down like tiny avalanches. These pops keep beautifully in an airtight container in the fridge for up to four days, though they taste best within the first two days when the coating is still snappy and the cake is still moist.
- Make your decorations a day ahead so you're not scrambling to attach ears while everything's setting.
- If an ear falls off, you can always re-glue it with a tiny dab of melted white chocolate using a toothpick.
- These freeze beautifully too, so you can make them a week early if you're really organized.
 Save
Save These little bunnies have taught me that food is really about the moment you're creating. There's something genuinely special about making something that brings people joy and gets passed around with genuine excitement.
Recipe Help
- → What type of cake mix works best?
Vanilla or funfetti cake mix provides a light and festive base that complements the creamy frosting and white chocolate coating.
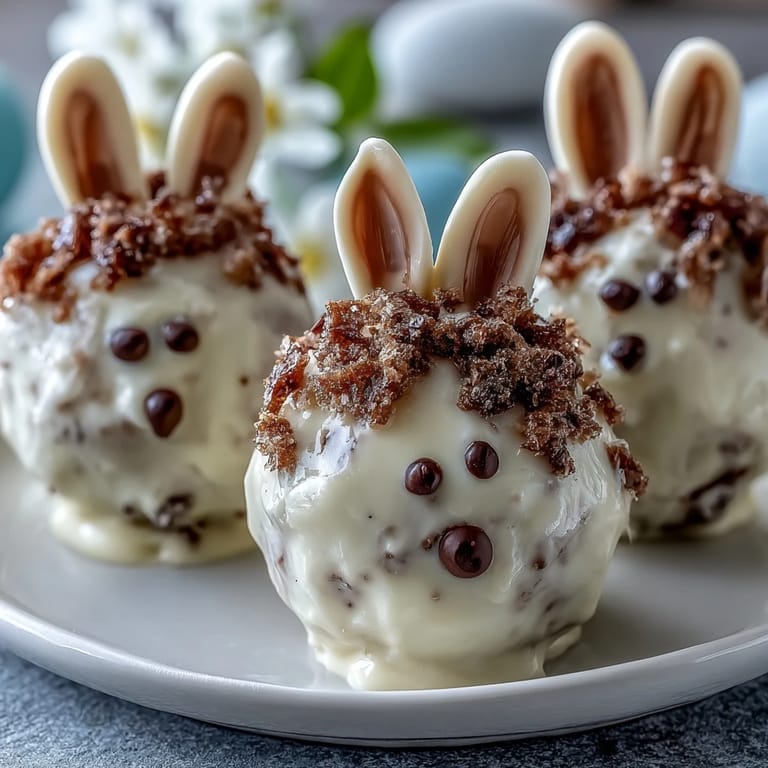
- → How do I shape the bunny features?
Form oval cake balls for heads, then use pink candy melts cut into ear shapes and mini marshmallows for tails. Details like eyes and whiskers are drawn with edible markers or dark chocolate.
- → Can I prepare these ahead of time?
Yes, the shaped cake balls can be frozen before dipping, and the finished pops should be stored in an airtight container in the refrigerator for up to four days.
- → Is there a gluten-free option?
Use gluten-free cake mix and ensure all coatings and decorations are gluten-free to accommodate dietary needs.
- → How do I prevent cracking in the chocolate coating?
Ensure the cake balls are well-chilled and the white chocolate is melted gently to avoid overheating before dipping for a smooth finish.