 Save
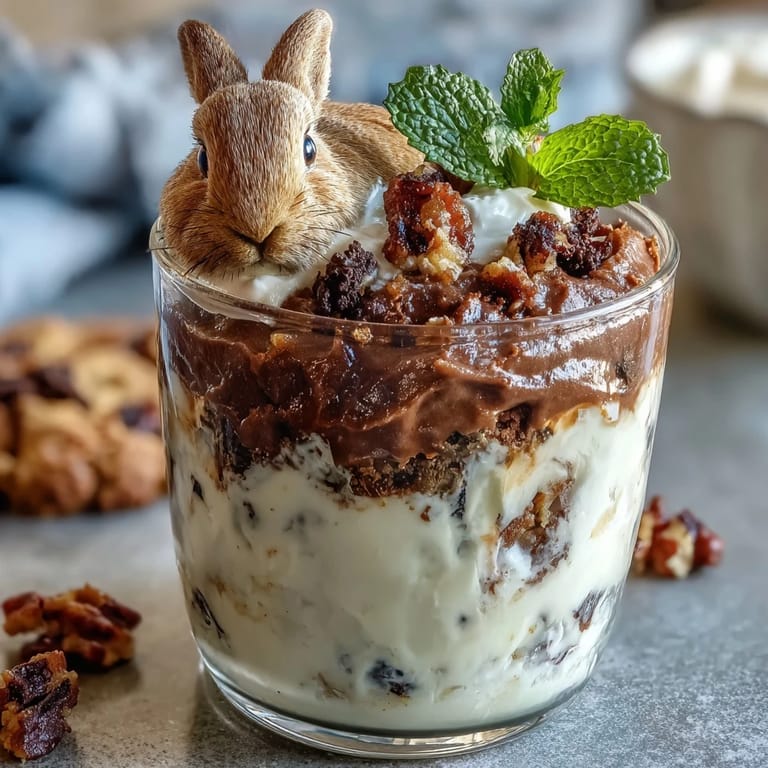
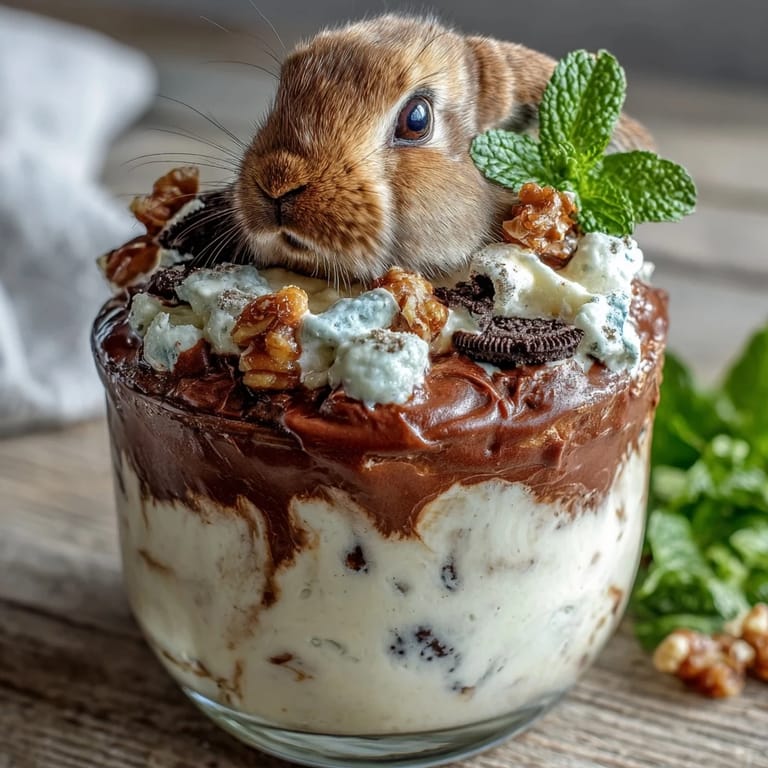
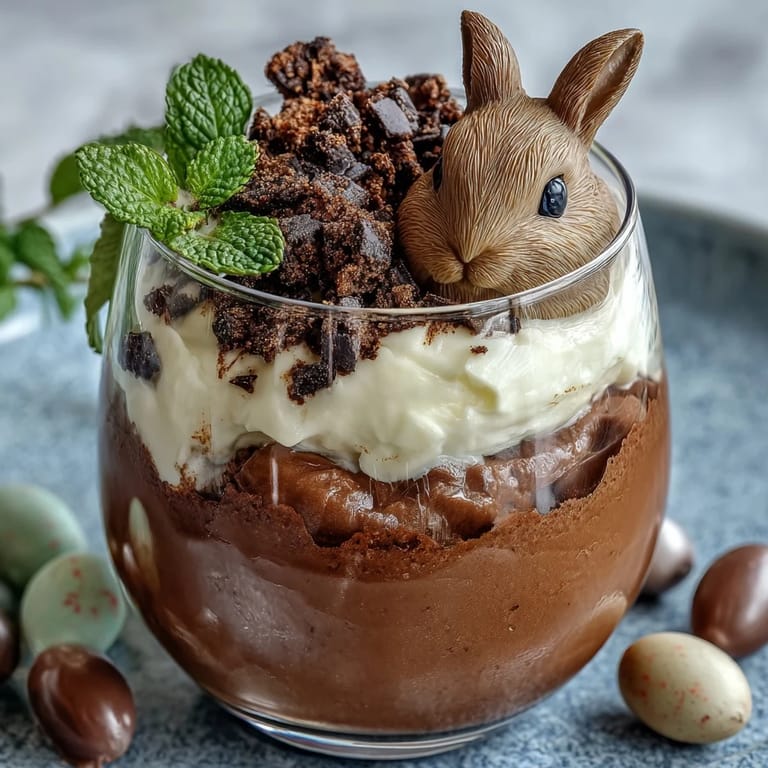
Save My daughter came home from school with a list of Easter party ideas, and halfway through reading it, she stopped me and asked if we could make something that looked like a garden. That single question led us to these dirt cups, which became our annual tradition the moment we assembled the first batch. There's something about layering chocolate pudding and crushed cookies that feels both silly and sophisticated, especially when you're decorating them with marshmallow bunnies at the kitchen table together. What started as a last-minute dessert idea turned into the highlight of every spring celebration we host.
I made a batch for my neighbor's Easter brunch last year, and I'll never forget watching her three-year-old's face light up when she spotted the little pastel bunny on top of hers. She ate the bunny first, obviously, then asked why dirt tasted so good, which made the entire room laugh. That moment reminded me that the best recipes aren't always the most complicated ones—sometimes it's the ones that spark joy the second you see them.
Ingredients
- Instant chocolate pudding mix (3.4 oz, 1 box): This is the flavor foundation, and instant versions set perfectly without cooking, which is exactly why they work here instead of scratch pudding.
- Cold whole milk (2 cups): The temperature matters more than you'd think—cold milk helps the pudding thicken properly and gives you that silky texture.
- Oreo cookies (18 cookies, regular or golden): These become your edible dirt, and crushing them by hand in a bag gives you control over the chunk size, which I've learned affects the whole eating experience.
- Whipped topping like Cool Whip (1 cup): You can use homemade whipped cream if you want to feel fancy, but the store version is honestly more stable for sitting out at parties.
- Marshmallow bunny candies or Peeps (6-12): These are the playful centerpiece, and I've found that slightly stale ones hold their shape better than fresh ones.
- Pastel-colored sprinkles (1/4 cup): These add visual charm and a little sweetness, though they can soften if added too early.
- Mini candy eggs (1/3 cup, optional): The optional touch that transforms a simple dessert into an Easter scene, scattered throughout like an edible garden.
- Mint sprigs (6 small, optional): Fresh mint adds a garden-like touch and a subtle contrast to all the sweetness, plus it looks genuinely elegant.
Tired of Takeout? 🥡
Get 10 meals you can make faster than delivery arrives. Seriously.
One email. No spam. Unsubscribe anytime.
Instructions
- Mix the pudding like you mean it:
- Whisk the pudding mix and cold milk together for a full 2 minutes—this isn't a suggestion, it's what activates the thickening agent. Let it sit untouched for 5 minutes after, and you'll watch it transform from liquid to that glossy, spoonable texture.
- Crush the cookies into edible dirt:
- A food processor makes this quick, but the zip-top bag method is more satisfying and gives you better control over texture—some people like fine crumbles, others prefer chunky bits. Either way, you want pieces ranging from dust to pebble-sized.
- Build the first layer of dirt:
- Spoon 2 tablespoons of crushed Oreos into the bottom of each clear cup so you can see the contrast. This foundation layer is what makes the cup look like actual dirt when light hits it.
- Add the chocolate pudding:
- Divide the pudding evenly—I use a small ice cream scoop to keep portions consistent. This middle layer is where all the richness lives, so don't skimp.
- Create the top dirt layer:
- Another 2 tablespoons of crushed Oreos goes on top of the pudding, giving that authentic soil look. The contrast between the two cookie layers and the pudding between them is what makes these cups visually interesting.
- Crown with whipped topping:
- A generous dollop in the center is traditional, though some people like to swirl it around like actual whipped cream on a slice of pie. Use a spoon or, if you're feeling fancy, a piping bag with a star tip.
- Decorate like you're arranging a spring garden:
- This is where personality enters the picture—scatter your marshmallow bunnies, candy eggs, and sprinkles however you'd like. A sprig of mint on the side finishes the garden effect beautifully.
- Serve or store with intention:
- These are best enjoyed the day you make them while the cookies still have a bit of snap, though they'll hold in the refrigerator for up to 24 hours.
 Save
Save There's a particular magic in watching someone's eyes go wide when they realize the dessert they're about to eat is actually a playful, edible art project. These cups stopped being just a recipe in our kitchen and became a small tradition that signals spring has arrived.
Choosing Your Decorations Wisely
The beauty of these dirt cups is that you can theme them however you want depending on what's available and what you love. Pastel sprinkles feel Easter-specific, but rainbow ones work just as well for spring celebrations in general. I've also used crushed candy hearts, gummy worms, and even small animal-shaped cookies to switch things up based on the season or occasion.
Making Them Your Own
Some families swear by butterscotch pudding instead of chocolate, which sounds unconventional until you taste it with crushed cookies and whipped cream. Others layer in crushed graham crackers or vanilla wafers for a completely different texture experience. The structure is flexible enough that you can experiment without the dessert falling apart.
Storage and Make-Ahead Tips
These cups are genuinely convenient for entertaining because most of the work can happen hours in advance. Just keep everything in separate containers until the last moment, then layer and decorate right before serving.
- Make the pudding and store it covered in the fridge up to 24 hours before assembling.
- Crush your cookies the morning of serving so they stay crisp rather than absorbing moisture.
- Add all decorative toppings no more than an hour before guests arrive to maintain texture and freshness.
 Save
Save These dirt cups turned out to be one of those recipes that travels beautifully between generations and occasions, always landing as a small celebration in a cup. Make them once, and they'll likely become part of your own spring traditions too.
Recipe Help
- → Can I make these cups gluten-free?
Yes, substitute the crushed Oreos with gluten-free sandwich cookies to maintain the crunchy texture without gluten.
- → How long should the pudding be chilled before layering?
Allow the instant pudding mixture to set for about 5 minutes after whisking, ensuring it thickens for easy layering.
- → What alternatives exist for bunny decorations?
You can use chocolate bunny candies, marshmallow bunnies, or even gummy worms for added fun and variety.
- → Is it possible to prepare these cups ahead of time?
Yes, prepare and refrigerate them up to 24 hours in advance to maintain texture and freshness.
- → What tools are needed to crush the cookies effectively?
A food processor works best for fine crumbs, but a zip-top bag with a rolling pin can also effectively crush the cookies.